This is not always going to be a managed and curated editor with limited options. You can mod the game the same way the developers make changes to the game. Editors are nice because they typically keep you from doing “bad” things. But they also keep you from doing incredibly good things. An editor only allows you to do the things the developer set up for you to change. With direct access to the files you can do things the developer never expected. Sometimes that turns out horribly (okay, a lot of the time that turns out horribly), but sometimes it turns out brilliantly. We believe power trumps ease of use.
This is not always going to be a managed and curated editor with limited options. You can mod the game the same way the developers make changes to the game. Editors are nice because they typically keep you from doing “bad” things. But they also keep you from doing incredibly good things. An editor only allows you to do the things the developer set up for you to change. With direct access to the files you can do things the developer never expected. Sometimes that turns out horribly (okay, a lot of the time that turns out horribly), but sometimes it turns out brilliantly. We believe power trumps ease of use.
== The Map Editor ==
(see [[Map_Editor|the full Map Editor article]] for more)
[[File:ModGuide 1.png|thumb|right|200px|Creating a new map]]To enable the [[Map_Editor|Map Editor]] add the “-modding” (without the quotes) to the Launch Options for the game (in Steam, right-click the game, go to Properties, click Set Launch Options in the General tab). That will add a Map Editor button to the main menu of the game. From there you can decide if you want to modify an existing map, or create a new one. If you create a new one the menu to the right is presented.
For your first map I’d select a smaller map size. You probably assume that you will run out of space quickly on small maps, you would be wrong. Ashes small maps are what other games would call huge. The large ones are ridiculous and will take a lot of time to design. Practice on some small ones first.
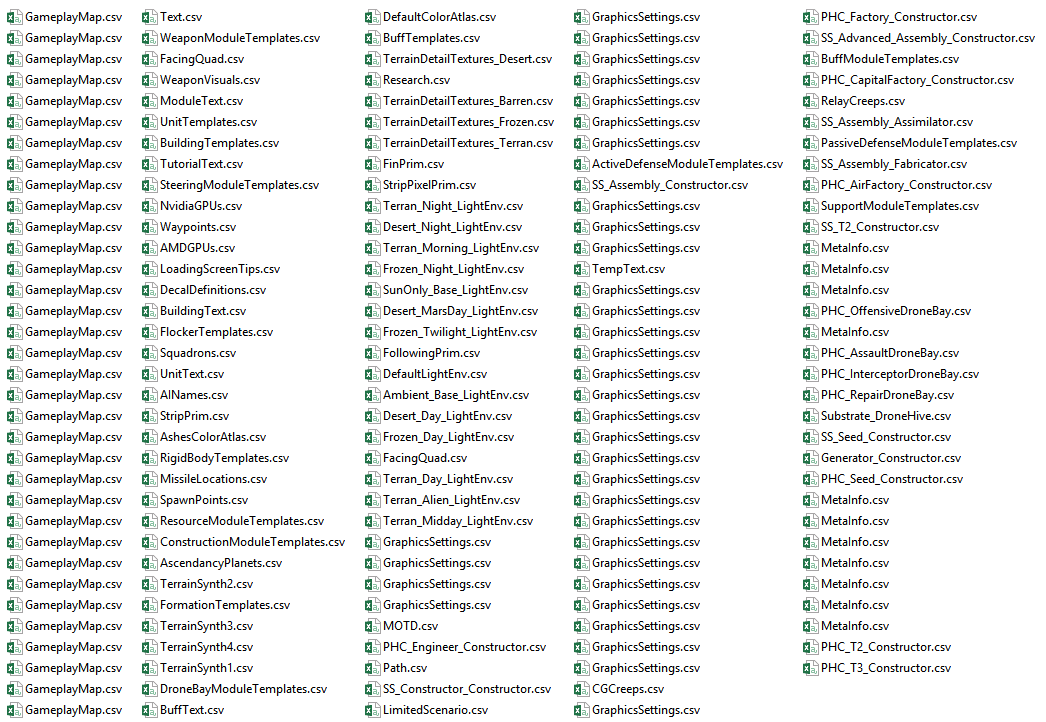
Most of the data that drives Ashes is stored in CSV and XML files, and there are a lot of them.
[[File:ModGuide 7.png|thumb|right|200px|Many, many CSV files]]
You can find these in the in the place the game is installed under the '''..\Ashes of the Singularity\Assets\''' directories. Modifying files in a game's directory isn’t for the faint of heart, so you will want to remember a few things:
#If you modify any of these files you can always get back to the original by verifying your game cache in Steam (which will revert all your files to the original game files).
#Conversely, if you verify your cache in Steam you will lose any local changes you have made.
#Game updates may overwrite any changes you have made locally, so make a backup of your changes.
#We plan to add a modding directory that will overwrite the game files, so you don’t have to modify the game files directly. But at the time that this guide is being written that functionality doesn’t exist. It won’t change what you can do, but it will make the process easier and cleaner.
#You cannot play multiplayer with modded games (that wouldn’t be fair or fun for the other player). So if you want to play multiplayer you will need to revert your changes. If you have forgotten about some of the changes you can use re-verify your files to get them back to default.
##'''Note: '''Adding new maps and scenarios via mod shouldn't lock you out of multiplayer, as those don't affect the existing game experience.
#You can modify the assets in Ashes but in general you cannot add new ones. This is because the UI wouldn’t show them in the build menus. So if you had a new unit you wanted to build at a factory it wouldn’t be displayed in the units the factory could produce. You could make a new unit to have the player start with, to reward the player with after he completes a trigger (more about those later), etc.
== Moddable Game Files (added in Escalation 2.2) ==
Just as with the Map Editor, to enable the game modifications add the “-modding” (without the quotes) to the Launch Options for the game (in Steam, right-click the game, go to Properties, click Set Launch Options in the General tab). That will add a Modifications button to the main menu of the game. You will not be able to play multiplayer if you are using Mods.
The game supports modding the directories Modders would be most interested in. These are:
*'''GameCore'''- The home of the most critical files, definitions for all the games units, buildings, weapons, orbital abilties, etc. This directory isn't additive, you make changes by replacing the file you want to change with a new one. For example, if you want to modify the hit poitns on the Zeus your mod will need to include a new UnitTemplates.csv file with the hit point value for the Zeus changed.
*'''Maps'''- For adding new maps with the mod.
*'''Scenario'''- For adding new scenarios with the mod. It is possible to modify existing scenarios with mods (by using the same name as that scenario file) but adding new scnearios with new names will be more common.
*'''UI'''- So a modder can add new art refered to by the Scenario file.
*'''UIText'''- For adding or changing existing text. Files placed here are additive (they don't need to replace an existing file). If you want to change a text string from the base game just include that string in your new text file and it will overwrite it.
To create a mod add a directory in your My Games/Ashes of the Singularity - Escalation/Mods/ directory with the name of the mod you would like to use.
[[File:ModDir.png|RTENOTITLE]]
In the above example the name of the Mod is BalanceMod. There is an index.ashesmod file that is a text file that contains the details about the mod. When you start the game it will create a generic one for you but the format is as follows:
<blockquote>[AshesMod]<br/> Name=Balance Mod<br/> Author=Rob Brink<br/> Description=This is a Balance mod that also includes the Weehawken Scenario.<br/> Version=1.1.10</blockquote>
This is purely informational, its what is displayed by the mod on the mod screen.
'''[[File:ModScreen.png|right|300px|ModScreen.png]]Note:''' Ashes can’t use a file if it is locked. If you have a file open with Excel and try to start Ashes, the game will likely crash. Close the file before starting Ashes.
'''Note:''' Ashes can’t use a file if it is locked. If you have a file open with Excel and try to start Ashes, the game will likely crash. Close the file before starting Ashes.
To use a mod go into the Modification screen from the main menu. You will see all of your Mods here and you can enable or disable them, and change the order they load in. This can also be changed by editing the My Games/Ashes of the Singularity - Escalation/Mods.ini file.
=== Notable Files for Modding ===
=== Notable Files for Modding ===
Line 49:
Line 76:
*'''\GameCore\ModuleTemplates\[[WeaponModuleTemplates.csv|WeaponModuleTemplates.csv]]''' - Controls rate of fire, range, targeting priority, damage, and everything else for all weapons.
*'''\GameCore\ModuleTemplates\[[WeaponModuleTemplates.csv|WeaponModuleTemplates.csv]]''' - Controls rate of fire, range, targeting priority, damage, and everything else for all weapons.
=== File Mod Example ===
=== [[File:ModGuide 7.png|right|300px|ModGuide 7.png]]File Mod Example ===
There are a lot of files, with a lot of fields that can be tweaked and changed. For this demo we are going to mess with my favorite file, '''[[UnitTemplates.csv|UnitTemplates.csv]]'''.
There are a lot of files, with a lot of fields that can be tweaked and changed. For this demo we are going to mess with my favorite file, '''[[UnitTemplates.csv|UnitTemplates.csv]]'''.
I had to adjust away from my typical [[Artemis]] (long range missile ships) to Nemesis (which are really good against enemy dreadnoughts) to be able to begin killing them faster than he could produce them. I also needed to invest heavily in anti-air [[Apollo|Apollos]] to counter the AI’s strike fleets of [[aircraft]] that nearly cost me the game.
I had to adjust away from my typical [[Artemis|Artemis]] (long range missile ships) to Nemesis (which are really good against enemy dreadnoughts) to be able to begin killing them faster than he could produce them. I also needed to invest heavily in anti-air [[Apollo|Apollos]] to counter the AI’s strike fleets of [[Aircraft|aircraft]] that nearly cost me the game.
Once the lines were broken I turned the biggest Ashes armada I had ever controlled against his Nexus. There were a lot of [[dreadnoughts]] fighting their way up that hill, and the explosions, missile trails and laser blasts cut through and won me the game.
Once the lines were broken I turned the biggest Ashes armada I had ever controlled against his Nexus. There were a lot of [[Dreadnoughts|dreadnoughts]] fighting their way up that hill, and the explosions, missile trails and laser blasts cut through and won me the game.
Overall it is amazing how much game play can change with these changes. If I were to do it again I might keep the reduced cost overall, but maybe just 50% off rather than 90%. I liked the larger armies, but it was a crazy experience more like fighting a fire than playing chess.
Overall it is amazing how much game play can change with these changes. If I were to do it again I might keep the reduced cost overall, but maybe just 50% off rather than 90%. I liked the larger armies, but it was a crazy experience more like fighting a fire than playing chess.
Line 109:
Line 136:
Modifying the files this way works, you just need to count the amount of fields, remembering that commas separate the fields (CSV stands for Comma Separated Values) to get to the right values.
Modifying the files this way works, you just need to count the amount of fields, remembering that commas separate the fields (CSV stands for Comma Separated Values) to get to the right values.
=== Adding a new Map to a Mod ===
It is also possible to add a custom map to a Mod. The in-game map editor will always create a map in the default \Assets\Maps\<mapname> directory. To include that map in your mod, once created you'll need to move the entire map directory into your <ModName>\Maps directory. Once the map is in the mod directory and the game is restarted, the Map Editor will be able to edit the map directly from the mod directory.
=== Current Limitations (Ashes 2.2) ===
The Ashes developers are working to expand Modding support, however there are a few significant limtations to the existing modification support.
The following files from the Ashes \Assets\ directory are currently NOT modifiable.
*'''\Units\''': Contains the models and textures for all the units in the game.
*'''\Buildings\''': Contains the models and textures for all the buildings in the game.
*'''\Formation\[[FlockerTemplates.csv|FlockerTemplates.csv]]''': Controls the Max Acceleration, Max Velocity, and other movement related parameters.
*'''\Physics\[[RigidBodyTemplates.csv|RigidBodyTemplates.csv]]''': Controls the physics collision dimensions and mass.
=== Safe Mode ===
If your Ashes instalation with Mods gets into a state where the game fails to load. It is possible to still load the game via safe mode. Safe mode will not load any mods, but will still present the user interface for enabling and disabling mods. You can open the interface, disable the offending Mod, and restart Ashes in the normal mode.
To start safe mode, select the option from the launch menu in steam, or add "-safe" to the command line arguments.
== Scripting – Creating Scenarios ==
== Scripting – Creating Scenarios ==
Line 119:
Line 163:
All of this is stored in XML, not code. So you don’t need any special programming tools or experience to use it. The best advice for seeing what is possible is to look through the \Assets\Campaign\ and \Scenario\ directories and see what the xml files are doing. Some examples are also included below.
All of this is stored in XML, not code. So you don’t need any special programming tools or experience to use it. The best advice for seeing what is possible is to look through the \Assets\Campaign\ and \Scenario\ directories and see what the xml files are doing. Some examples are also included below.
There are three main elements in Ashes scripting: [[Missions (scripting)|missions]], [[Player (scripting)|players]] and [[Triggers|triggers]]. Missions are the definition or the scenario. Players defines the players that are going to be used in the scenario. Triggers are where all the magic happens. Triggers have a lot of elements and options.
There are three main elements in Ashes scripting: [[Missions_(scripting)|missions]], [[Player_(scripting)|players]] and [[Triggers|triggers]]. Missions are the definition or the scenario. Players defines the players that are going to be used in the scenario. Triggers are where all the magic happens. Triggers have a lot of elements and options.
Note that all triggers and arguments are case-sensitive.
Note that all triggers and arguments are case-sensitive.
Line 125:
Line 169:
=== Mission Definition ===
=== Mission Definition ===
The first thing you have to do is define the global settings for the mission. This is done in the top-level <Mission> tag, right at the top of your XML file.
First, you set up all the menu-related items (what icons/art to use in the Ascendancy Wars screen, etc) and global settings like enabling/disabling creeps and hiding terrain, using a [[Missions_(scripting)|<Mission> tag]].
*'''Title''' - Title of the mission (refers to a line in a .csv file in \Assets\UIText\ )
*'''Description''' - Description of the mission (refers to a line in a .csv file in \Assets\UIText\ )
*'''Synopsis''' - Brief description of the mission (refers to a line in a .csv file in \Assets\UIText\ )
*'''Map''' - What map this mission uses (must be the name of a folder in \Assets\Maps\ )
*'''EnableCreeps''' - Are creeps enabled in this map? [ Heavy | Random | Light | Normal ]
*'''HideTerrain''' - Should the world start revealed or not? [ 1 | 0 ]
*'''NoAttrition''' - Set this to make buildings not lose any health in uncontrolled regions. [ 1 | 0 ]
*'''NoVPVictory''' - Set this to disable the generic Turinium victory [ 1 | 0 ]
*'''NoSeedVictory''' - Set this to disable the generic Nexus-kill victory [ 1 | 0 ]
*'''ImageBig''' - Campaign: The close up image of the planet | Scenario: The image used on the Ascendancy Wars screen
*'''Image''' - Campaign: The image displayed when this mission is selected
*'''ImageFade''' - Campaign: The image displayed when this mission isn’t selected
*'''CompImage''' - Campaign: The image displayed when the mission is selected and already completed
*'''CompImageFade''' - Campaign: The image displayed when the mission is not selected and already completed
*'''ImageRadius''' - Campaign: How big the image is
*'''PlanetPosition''' - Campaign: Where the planet is displayed in the campaign screen
*'''Prereq''' - Campaign: Title of the mission that must be completed to unlock this (refers to a line in a .csv file in \Assets\UIText\ )
*'''PreMovie''' - Movie to play when loading the mission (must be a valid .webm path, starting in \Assets\)
*'''PostMovie''' - Movie to play on completing the mission (must be a valid .webm path, starting in \Assets\)
=== Player Definition ===
=== Player Definition ===
To do much of anything, you'll need to define [[Player (scripting)|players]] next. This is done with individual <Player> tags, as seen below.
To do much of anything, you'll need to define [[Player_(scripting)|players]] next. This is done with individual <Player> tags that enable or disable their AI, sets faction, team, and color, etc.
You'll likely refer to these players later in the script by number, where 0 is the first player defined, 1 is the next, and so on.
You'll likely refer to these players later in the script by number, where 0 is the first player defined, 1 is the next, and so on.
*'''Name''' - Name of the player
*'''Faction''' - Faction the player belongs to [ PHC | SS ]
*'''Team''' - What team the player belongs to
*'''Color''' - What is the team color for the player [ 1-14 ]
*'''AIType''' - Set to “Player” if this is player controlled. "On" for AI control, "Off" for passive [ On | Off | Player ]
*'''AIDifficulty''' - What setting this AI player is on [ Beginner | Novice | Easy | Intermediate | Normal | Challenging | Tough | Painful | Insane ]
*'''NoSeed''' - Set this to 1 to disable a Nexus for the player. ''Note: Doing this will mean you need to manually set victory/loss triggers, as the generic Seed Victory condition won't trigger.''
*'''NoEngineer''' - Set this to 1 if the player isn’t going to start with an Engineer.
*'''StartLocation''' - Which start location the player uses. Corresponds with what you see in the skirmish lobby.
=== Triggers ===
=== Triggers ===
[[Triggers]] are what control anything you want to happen while the scenario is being played, from spawning starting base to calling waves of attacking enemies or giving players objectives. There are several types of triggers which activate off of different events, but they all share some attributes in common:
[[Triggers|Triggers]] are what control anything you want to happen while the scenario is being played, from spawning starting base to calling waves of attacking enemies or giving players objectives. There are several types of triggers which activate off of different events.
*'''Name''' - Name of the trigger. Required.
*'''Type''' - What type of trigger it is. See below. Required.
*'''Inactive''' - If this trigger is inactive, to activate use the ActivateTrigger option from another Trigger.
*'''OtherTrigger''' - Name of another trigger that must have fired before this one will activate. Use this to set multiple conditions on a trigger occurring.
*'''NotOtherTrigger''' - Inverse of OtherTrigger. If the other trigger has fired this trigger won’t fire. Us this to create branching options in your scenario.
=== Trigger Types ===
=== Trigger Types ===
Line 182:
Line 185:
These are the types of triggers you can use in a script, and any specific arguments they support.
These are the types of triggers you can use in a script, and any specific arguments they support.
<br/> '''[[Area Trigger|Area]]''' - Fires when the human player moves a unit into the area.
*'''[[Area_Trigger|Area]]''' - Fires when the human player moves a unit into the area.
*'''Center''' - Map coordinates of the center of the area. Required.
*'''Size''' - Size of the area.
*'''Template''' - Template name of the unit that can trigger this. If you want it to fire if any unit enters the area, do not specify a Template argument.
<br/> '''[[Build Trigger|Build]]''' - Fires when a human player builds structures or units.
*'''Target''' - The template of the building that will fire this trigger
*'''IsBuilding''' - Set to "1" if the target is a building
*'''Count''' - How many of the target template must be built to fire the trigger (default 1)
<br/> '''[[Destruction Trigger|Destruction]]''' - Fires when something specific dies.
*'''IsBuilding''' - If this is a building (if not it refers to a unit).
*'''Target''' - Name of the script-spawned unit or building.
<br/> '''[[Difficulty Trigger|Difficulty]]''' - Fires at the beginning of a scenario if the given difficulty was chosen
*
*'''[[Build_Trigger|Build]]''' - Fires when a human player builds structures or units.
**'''Difficulty''' - The given difficulty (0 for Much Easier, up to 4 for Much Harder)
*'''[[Destruction_Trigger|Destruction]]''' - Fires when something specific dies.
<br/> '''[[NamedCreate Trigger|NamedCreate]]''' - Fires when a specific unit or building is spawned via a script.
*'''[[Difficulty_Trigger|Difficulty]]''' - Fires at the beginning of a scenario if the given difficulty was chosen
*'''Target''' - Name of the script-spawned unit or building.
*'''[[NamedCreate_Trigger|NamedCreate]]''' - Fires when a specific unit or building is spawned via a script.
*'''IsBuilding''' - If this is a building (if not it refers to a unit).
<br/> '''[[Research Trigger|Research]]''' - Fires when a player researches a Quantum Upgrade
*'''[[Research_Trigger|Research]]''' - Fires when a player researches a Quantum Upgrade
*'''Player''' - The player doing the research
*'''[[Timer_Trigger|Timer]]''' - Fires after a delay.
*'''Target''' - The name of the tech
<br/> '''[[Timer Trigger|Timer]]''' - Fires after a delay.
*'''[[Var_Trigger|Var]]''' - Fires if a variable meets given criteria
*'''Time -''' Time in seconds after this gets triggered that it takes place.
*'''[[ZoneCapture_Trigger|ZoneCapture]]''' - Fires when a region is captured.
<br/> '''[[Var Trigger|Var]]''' - Fires if a variable meets given criteria
*'''Var''' - The name of the variable to check
*'''Operator''' - What logical operator to use when evaluating the variable (equal to, less than, etc) '''[ == | >= | <= | > | < | != ]'''
*'''Value''' - The (integer) value to compare the variable against
*''Example: <Trigger Name="tWeasleyDead" Type="Var" Var="vWeasleyDead" Operator="==" Value="1" > - this fires when the "vWeasleyDead" variable is equal to 1''
<br/> '''[[ZoneCapture Trigger|ZoneCapture]]''' - Fires when a region is captured.
*'''Owner''' - Player who must capture this region to fire the trigger.
*'''Position''' - Map coordinates of the generator/Nexus.
Line 235:
Line 207:
=== Commands ===
=== Commands ===
These are the [[Script Commands|commands]] you can put within a trigger to create gameplay effects.
These are the [[Script_Commands|commands]] you can put within a trigger to create gameplay effects.
<br/> '''[[ActivateTrigger]]''' - Activate another trigger (also can be used to activate the trigger it is called from, making a repeating trigger).
See the [[Script_Commands|main Commands entry]] for details.
*'''Target''' - This is the name of another trigger that will be set from Inactive to Active.
*'''[[ActivateTrigger|ActivateTrigger]]''' - Activate another trigger (also can be used to activate the trigger it is called from, making a repeating trigger).
*'''[[AreaIndicator|AreaIndicator]]''' - This places a visible indicator on the map to help the player know where they should go to.
<br/> '''[[AreaIndicator]]''' - This places a visible indicator on the map to help the player know where they should go to.
*'''[[AttackAttackMove|AttackAttackMove]]''' - Order an army to move to a specific area, engaging enemies along the way.
*'''[[AttackUnit|AttackUnit]]''' - Order an army to attack a specific script-spawned unit
*'''Name''' - The name of the area.
*'''[[Camera|Camera]]''' - Move the player's view to a specific area.
*'''Position''' - The center of the area.
*'''[[CaptureNearestNext|CaptureNearestNext]]''' - Order an army to capture the nearest neutral or enemy-controlled region
*'''Color''' - The color the area indicator is. [ Green | Blue | Red ]
*'''[[CaptureNearest|CaptureNearest]]''' - Order an army to clear its order queue and capture the nearest neutral or enemy-controlled region (note: ordered unit will stop moving if region is captured before it gets there)
*'''Size''' - How big the area indicator will be.
*'''[[ChangeAIDifficulty|ChangeAIDifficulty]]''' - Change an AI player's difficulty setting
*'''Duration''' - How long the area indicator should last, -1 means that it lasts forever.
*'''[[ChangeAIPersonality|ChangeAIPersonality]]''' - Change an AI player's personality
*'''[[DestroyBuilding|DestroyBuilding]]''' - Destroys a specific script-spawned building.
<br/> '''[[AttackAttackMove]]''' - Order an army to move to a specific area, engaging enemies along the way.
*'''[[DestroyUnit|DestroyUnit]]''' - Destroys a specific script-spawned unit.
*'''[[Dialog|Dialog]]''' - This creates a popup that can convey information or story to the player. Use with <Entry> tags.
*'''Name''' - The name of the army that will be given the order.
*'''[[Entry|Entry]]''' - The actual text that will be displayed. Use only within <Dialog> tags.
*'''Repeat''' - Whether to repeat the order. Use with multiple AttackAttackMove commands to create a patrol path.
*'''[[EndMission|EndMission]]''' - Use to force a win or loss of the scenario.
*'''Position''' - Where the army is ordered to move to.
*'''[[GrantStuff|GrantStuff]]''' - Give a player free resources
*'''[[GrantTech|GrantTech]]''' - Give a player a free Quantum Upgrade
<br/> '''[[AttackUnit]]''' - Order an army to attack a specific script-spawned unit
*'''[[HidePanel|HidePanel]]''' - Hide UI panels
*'''[[LetterBox|LetterBox]]''' - disable commands and go to a cinematic, letterbox view
*'''Name''' - The name of the unit to do the attacking
*'''[[MoveUnit|MoveUnit]]''' - Move an army to a location without stopping to fight
*'''Target''' - The name of the unit to be attacked
*'''[[Objective|Objective]]''' - Use this to set objective notifications for the player (so they know what to do).
*'''[[Restrict|Restrict]]''' - To block the player from being able to access objects in the game.
<br/> '''[[Camera]]''' - Move the player's view to a specific area.
*'''[[Reveal|Reveal]]''' - Reveal the fog of war over a location
*'''[[SpawnBuilding|SpawnBuilding]]''' - Places a building on the map.
*'''Position''' - Where the camera will be looking.
*'''[[SpawnUnit|SpawnUnit]]''' - Places a unit on the map.
*'''Snap''' - Set to 1 to move the camera instantly, instead of panning
*'''[[Var_Command|Var]]''' - Set or modify a variable. Tip: Set any variable you want to use to 0 in the initial setup trigger to avoid unpredictable results. ''All values must be integers.''
*'''Speed''' - Scalar for how fast the camera will move, compared to clicking on the minimap. 0.5 for half speed, 2 for double, etc.
*'''Unit''' - Follow a specific script-spawned unit. Do not use Position if you use this.
*'''Building''' - Follow a specific script-spawned building. Do not use Position if you use this.
*'''Save''' - Save the current camera settings. Useful if you want to show the player something and then move the camera back to whatever they were looking at.
*'''Load''' - Load the last saved camera settings. Use with Save. May cause a crash if you haven't previously saved a camera position.
*'''RTP''' - Distance, rotation and pitch of the camera.
**The first number is distance. 1000 is a fairly tight shot, 2500 is a fairly typical gameplay zoom
**Second number is rotation. 0 points the camera north, 90 east, 180 south, 270 west.
**Third number is pitch. 40-50 are typical gameplay angles. 90 would be straight down. Note that anything lower than 40 can cause the engine to load a '''lot''' more terrain and models than it's designed to, so use with caution.
<br/> '''[[CaptureNearestNext]]''' - Order an army to capture the nearest neutral or enemy-controlled region
*'''Name''' - The name of the unit to do the capturing
*'''Repeat''' - Whether to repeat the order (indefinitely)
<br/> '''[[CaptureNearest]]''' - Order an army to clear its order queue and capture the nearest neutral or enemy-controlled region (note: ordered unit will stop moving if region is captured before it gets there)
*'''Name''' - The name of the unit to do the capturing
*'''Repeat''' - Whether to repeat the order (indefinitely)
<br/> '''[[ChangeAIDifficulty]]''' - Change an AI player's difficulty setting
*'''Player''' - The index of the player to change
*'''Difficulty''' - The name of the difficulty to set it to
<br/> '''[[ChangeAIPersonality]]''' - Change an AI player's personality
*'''Player''' - The index of the player to change
*'''Name''' - The name of the personality to set it to (defined in \Assets\GameCore\DefaultPlayerAI.xml)
<br/> '''[[DestroyBuilding]]''' - Destroys a specific script-spawned building.
*'''Name''' - The name of the building to be destroyed.
<br/> '''[[DestroyUnit]]''' - Destroys a specific script-spawned unit.
*'''Name''' - The name of the unit to be destroyed.
<br/> '''[[Dialog]]''' - This creates a popup that can convey information or story to the player. Use with <Entry> tags.
<br/> '''[[Entry]]''' - The actual text that will be displayed. Use only within <Dialog> tags.
*'''Icon''' - The icon used with the text popup. Hard-coded to correspond to Ashes characters, and changes the text color to match.
**Mac
**Haalee
**Vexen
**Valen
**Artix
**Ventrix
**Athena
**Adrasteia
**Agememnon
**Agethon
*'''Text''' - The actual text that is displayed. Corresponds to an entry in a .csv file in \Assets\UIText\
<br/> '''[[EndMission]]''' - Use to force a win or loss of the scenario.
*'''Victory''' - Set to 0 to lose the scenario or 1 to win.
*'''String''' - The text that is displayed.
<br/> '''[[GrantStuff]]''' - Give a player free resources
*'''Player''' - The index of the player to be hooked up
*'''Metal''' - The amount of metal being granted.
*'''Quanta''' - The amount of quanta being granted.
*'''Radioactives''' - The amount of radioactives being granted.
*'''Turinium''' - The amount of victory points being granted.
<br/> '''[[GrantTech]]''' - Give a player a free Quantum Upgrade
*'''Player''' - The index of the player to be hooked up
*'''Tech''' - The upgrade to grant [ HPs | Weapons | Radar | BuildingHPs | MetalStorage | RadsStorage ]
<br/> '''[[HidePanel]]''' - Hide UI panels
*'''HidePlayer''' - Hide the Player panel
*'''HideRank''' - Hide the Rank panel
*'''HideResource''' - Hide the Resource panel
<br/> '''[[LetterBox]]''' - disable commands and go to a cinematic, letterbox view
*'''Enable''' - 1 to turn letterbox mode on, 0 to turn it off
*'''Snap''' - 1 to immediately go to/from letterbox mode instead of fading in/out
<br/> '''[[MoveUnit]]''' - Move an army to a location without stopping to fight
*'''Name''' - Name of the unit to be moved
*'''Position''' - x/y coordinates to move to
*'''Repeat''' - 1 to repeat this command indefinitely. Use with multiple MoveUnit commands to create a patrol path.
*'''Stop''' - 1 to stop the unit
<br/> '''[[Objective]]''' - Use this to set objective notifications for the player (so they know what to do).
*'''Name''' - The name of the objective, use this name when checking or hiding it.
*'''Hide''' - If this objective should be hidden or not, usually this means the objective is complete.
*'''String''' - What the objective displays on the screen.
*'''SetCheck''' - If the objective checkbox is checked or not.
<br/> '''[[Restrict]]''' - To block the player from being able to access objects in the game.
*'''Type''' - Unit, Building, Research or Orbital. Whatever type of object that is being restricted.
*'''ID''' - The name of the object being restricted.
*'''Enable''' - Set this to 1 to enable the object. You can use this to restrict something early in the scenario and then enable it later on (for example: when the player accomplishes an objective or after a set amount of time).
<br/> '''[[Reveal]]''' - Reveal the fog of war over a location
*'''Name''' - The name of this reveal (so you can modify it with a later command)
*'''Enable''' - 1 to enable, 0 to disable
*'''Position''' - x/y coordinates of the center of the revealed area
*'''Size''' - Radius of the area to be revealed
*'''RadarSize''' - Use to add a radar component to the reveal. Can be used with Size="0" to create a radar-only reveal
<br/> '''[[SpawnBuilding]]''' - Places a building on the map.
*'''Name''' - The name you assign to the building.
*'''Template''' - The name of the building type being created.
*'''Player''' - The player who will own the building.
*'''Position''' - Where the building will be placed.
*'''NoDeath''' - Set this to "1" to make the unit immortal (you can still kill it with a scripted DestroyBuilding command)
<br/> '''[[SpawnUnit]]''' - Places a unit on the map.
*'''Name''' - The name you assign to the unit.
*'''Parent''' - The army the unit will belong to (used to make it easier to issue moves).
*'''Template''' - The type of unit being created.
*'''Player''' - The player that will own the unit.
*'''Position''' - Where the unit will be created.
<br/> '''[[Var]]''' - Set or modify a variable. Tip: Set any variable you want to use to 0 in the initial setup trigger to avoid unpredictable results. ''All values must be integers.''
*'''Name''' - Name of the variable
*'''Operation''' - Operation to be performed
**"=" or "Set" - set to the value
**"+" or "Add" - add value
**"-" or "Sub" - subtract value
**"Rand" or "SetRand" - set to a random value between Min and Max
**"AddRand" - add a random value between Min and Max
**"SubRand" - subtract a random value between Min and Max
*'''Value''' - The value to be used in the operation
*'''Min''' - Minimum value for random functions
*'''Max''' - Maximum value for random functions
*'''Example''' - ''<Var Name="vFoo" Operation="+" Value="3" />'' will add three to vFoo's current value
== Position Coordinates ==
== Position Coordinates ==
The UI for Ashes is defined in XML, it is as moddable as the rest of the game. But we just want to make one small change, we want the game to show us the [[coordinates]]. Fortunately there is already a field for that in the UI, it’s just marked hidden. You will find the following toward the end of '''[[AshesGameView.xml]]''':
The UI for Ashes is defined in XML, it is as moddable as the rest of the game. But we just want to make one small change, we want the game to show us the [[Coordinates|coordinates]]. Fortunately there is already a field for that in the UI, it’s just marked hidden. You will find the following toward the end of '''[[AshesGameView.xml|AshesGameView.xml]]''':
[[File:ModGuide 28.png|center|Changing the XML to show locations]]
To have the coordinates be displayed in game, change this to Hidden=”0”. 0 typically means False and 1 means True so by setting it to 0 we are setting it to “Not Hidden”. You may also want to reduce the FontSize, 20 tends to be fairly large but that is up to you.
To have the coordinates be displayed in game, change this to Hidden=”0”. 0 typically means False and 1 means True so by setting it to 0 we are setting it to “Not Hidden”. You may also want to reduce the FontSize, 20 tends to be fairly large but that is up to you.
Line 449:
Line 272:
This is a great example of the kind of combinations that can be done with the trigger system. This is a reward to the player for capturing the region. But it could as easily have triggered an escalation for the enemy forces.
This is a great example of the kind of combinations that can be done with the trigger system. This is a reward to the player for capturing the region. But it could as easily have triggered an escalation for the enemy forces.
[[Category:Modding]]
Revision as of 14:17, 15 March 2017
Ashes of the Singularity gives you access to a powerful strategy game engine to create your own scenarios, objects and worlds. The designers have had a lot of fun creating scenarios for the game, and you will have access to the same features they had to create your own.
There is a lot to do in Ashes. But it was also built from the ground up to be mod friendly. Modders have access to the gameplay elements to change and tweak as they desire. This document will introduce some of what is possible, and we will make a map and a mod to take advantage of this.
This is not always going to be a managed and curated editor with limited options. You can mod the game the same way the developers make changes to the game. Editors are nice because they typically keep you from doing “bad” things. But they also keep you from doing incredibly good things. An editor only allows you to do the things the developer set up for you to change. With direct access to the files you can do things the developer never expected. Sometimes that turns out horribly (okay, a lot of the time that turns out horribly), but sometimes it turns out brilliantly. We believe power trumps ease of use.
To enable the Map Editor add the “-modding” (without the quotes) to the Launch Options for the game (in Steam, right-click the game, go to Properties, click Set Launch Options in the General tab). That will add a Map Editor button to the main menu of the game. From there you can decide if you want to modify an existing map, or create a new one. If you create a new one the menu to the right is presented.
For your first map I’d select a smaller map size. You probably assume that you will run out of space quickly on small maps, you would be wrong. Ashes small maps are what other games would call huge. The large ones are ridiculous and will take a lot of time to design. Practice on some small ones first.
A new, blank map
Moddable Game Files (added in Escalation 2.2)
Just as with the Map Editor, to enable the game modifications add the “-modding” (without the quotes) to the Launch Options for the game (in Steam, right-click the game, go to Properties, click Set Launch Options in the General tab). That will add a Modifications button to the main menu of the game. You will not be able to play multiplayer if you are using Mods.
The game supports modding the directories Modders would be most interested in. These are:
GameCore- The home of the most critical files, definitions for all the games units, buildings, weapons, orbital abilties, etc. This directory isn't additive, you make changes by replacing the file you want to change with a new one. For example, if you want to modify the hit poitns on the Zeus your mod will need to include a new UnitTemplates.csv file with the hit point value for the Zeus changed.
Maps- For adding new maps with the mod.
Scenario- For adding new scenarios with the mod. It is possible to modify existing scenarios with mods (by using the same name as that scenario file) but adding new scnearios with new names will be more common.
UI- So a modder can add new art refered to by the Scenario file.
UIText- For adding or changing existing text. Files placed here are additive (they don't need to replace an existing file). If you want to change a text string from the base game just include that string in your new text file and it will overwrite it.
To create a mod add a directory in your My Games/Ashes of the Singularity - Escalation/Mods/ directory with the name of the mod you would like to use.
In the above example the name of the Mod is BalanceMod. There is an index.ashesmod file that is a text file that contains the details about the mod. When you start the game it will create a generic one for you but the format is as follows:
[AshesMod] Name=Balance Mod Author=Rob Brink Description=This is a Balance mod that also includes the Weehawken Scenario. Version=1.1.10
This is purely informational, its what is displayed by the mod on the mod screen.
ModScreen.png
Note: Ashes can’t use a file if it is locked. If you have a file open with Excel and try to start Ashes, the game will likely crash. Close the file before starting Ashes.
To use a mod go into the Modification screen from the main menu. You will see all of your Mods here and you can enable or disable them, and change the order they load in. This can also be changed by editing the My Games/Ashes of the Singularity - Escalation/Mods.ini file.
Notable Files for Modding
The following files are simple to mod and can effect major changes to gameplay.
All files are found in the Ashes \Assets\ directory.
\GameCore\BuildingTemplates.csv - Controls build time, cost, armor, HP, and more for all buildings.
\GameCore\UnitTemplates.csv - Controls build time, cost, armor, HP, and more for all units.
\GameCore\ModuleTemplates\WeaponModuleTemplates.csv - Controls rate of fire, range, targeting priority, damage, and everything else for all weapons.
ModGuide 7.pngFile Mod Example
There are a lot of files, with a lot of fields that can be tweaked and changed. For this demo we are going to mess with my favorite file, UnitTemplates.csv.
UnitTemplates.csv
In this screenshot I’ve opened UnitTemplates.csv with Excel, because it makes it easier for me to work with, but Excel isn’t required. Notepad could be used to modify the file. If you use Excel remember to save it as a csv file.
There are a lot of fields that can be modified. In this screenshot we can see:
Max HPs
Max Energy
Energy Per Second
Armor
Heal Rate
Max Shields
Shield Regen Rate
Radar Radius
Cost Metal
Cost Data
Cost Energy
Cost Logistics
Construction Time
Some of these fields aren’t named the same as they are in game. Names change during the course of development, and we didn’t want to go back and change all these definitions to match each time they do. Because of that you may have to experiment a bit to see how things match. For example, PHC_T1_Light is the Brute, and Cost Data is actually the Radioactive cost of the unit. You can check out the translation tables in ..\Ashes of the Singularity\Assets\UIText\ directory to see how raw assets relate to in game assets.
Using this file alone, and just the things in this screenshot (there are many more fields in UnitTemplates.csv) we can dramatically alter the balance and design of the game. Let’s use the above to create a new game variant I call the Swarm Mod.
I love the scale of Ashes, I love large battles. So this mod is going to make even larger battles possible and we are going to get into them fast. To do that I’m going to make the following changes:
UnitTemplates.csv, modded
I’ve reduce the Metal, Radioactives, Logistics and Construction time costs by 90%. I’ve reduce the Logistics costs of T1 units to 0 (so you can have as many as you want). With these changes factories should produce 10 units in the time it took to produce 1 before. As long as you can keep feeding the (dramatically reduced) resource costs, units should come out of factories in an endless stream, like a tower defense game on steroids.
There are a lot of ways to tweak this concept. I could have kept the Metal and Radioactive costs the same and then the player would be strongly incented to claim and upgrade regions to keep his factories fed. I could have just halved the costs rather than dropping them by 90%. I could have increased the resource gathering rates of upgraded metal and radioactive mines rather than lowering costs to incent players to invest in their regions.
But for this we are going crazy. Everything gets very cheap. Massive armies can be built from the start of the game. Those poor creeps won’t know what hit them. And be prepared to be sieged by thousands of units.
Swarms of frigates!
This is 5 minutes into the game. I only have 2 factories putting out an endless stream of Brutes. I make an army out of them and in the time it takes to do that there are a bunch more waiting to be added. So I find that it works just as well to set the rally point of the factory to where I want to attack, so that my river of death flows out to destroy it.
Pew! Pew pew!
The AI has adapted to the new lower costs and is meeting my endless streams with its own. Unlike me it has opted to go with some cheaply produced dreadnoughts. The game lasts for 45 minutes, and there is a battle waging between my endless armies and his at this chokepoint for nearly all of it. It isn’t until I win more minor battles on some of outskirt regions (to take the resources which even at 90% off still become critical) and I send a strike force around to take out his factories that I cause his production chain to falter and begin to break through.
Pewpewpew!
I had to adjust away from my typical Artemis (long range missile ships) to Nemesis (which are really good against enemy dreadnoughts) to be able to begin killing them faster than he could produce them. I also needed to invest heavily in anti-air Apollos to counter the AI’s strike fleets of aircraft that nearly cost me the game.
Once the lines were broken I turned the biggest Ashes armada I had ever controlled against his Nexus. There were a lot of dreadnoughts fighting their way up that hill, and the explosions, missile trails and laser blasts cut through and won me the game.
Overall it is amazing how much game play can change with these changes. If I were to do it again I might keep the reduced cost overall, but maybe just 50% off rather than 90%. I liked the larger armies, but it was a crazy experience more like fighting a fire than playing chess.
If you decide to modify the csv files with a text editor (Notepad++ is my text editor of choice) you can do everything I was doing in Excel, it just isn’t formatted into columns to be easy to read. Instead it is raw text like the following:
A .csv file in Notepad++
Modifying the files this way works, you just need to count the amount of fields, remembering that commas separate the fields (CSV stands for Comma Separated Values) to get to the right values.
Adding a new Map to a Mod
It is also possible to add a custom map to a Mod. The in-game map editor will always create a map in the default \Assets\Maps\<mapname> directory. To include that map in your mod, once created you'll need to move the entire map directory into your <ModName>\Maps directory. Once the map is in the mod directory and the game is restarted, the Map Editor will be able to edit the map directly from the mod directory.
Current Limitations (Ashes 2.2)
The Ashes developers are working to expand Modding support, however there are a few significant limtations to the existing modification support.
The following files from the Ashes \Assets\ directory are currently NOT modifiable.
\Units\: Contains the models and textures for all the units in the game.
\Buildings\: Contains the models and textures for all the buildings in the game.
\Formation\FlockerTemplates.csv: Controls the Max Acceleration, Max Velocity, and other movement related parameters.
If your Ashes instalation with Mods gets into a state where the game fails to load. It is possible to still load the game via safe mode. Safe mode will not load any mods, but will still present the user interface for enabling and disabling mods. You can open the interface, disable the offending Mod, and restart Ashes in the normal mode.
To start safe mode, select the option from the launch menu in steam, or add "-safe" to the command line arguments.
Scripting – Creating Scenarios
Scripting allows you a huge amount of control over what exactly happens on the map you are creating. You can restrict what buildings and units the players can use, set up Triggers to lock or unlock them, spawn units or buildings for the players or their enemies. You can send units to attack specific targets and send dialog popups to the player. Everything you need to make your own custom Scenarios.
All of this is stored in XML, not code. So you don’t need any special programming tools or experience to use it. The best advice for seeing what is possible is to look through the \Assets\Campaign\ and \Scenario\ directories and see what the xml files are doing. Some examples are also included below.
There are three main elements in Ashes scripting: missions, players and triggers. Missions are the definition or the scenario. Players defines the players that are going to be used in the scenario. Triggers are where all the magic happens. Triggers have a lot of elements and options.
Note that all triggers and arguments are case-sensitive.
Mission Definition
First, you set up all the menu-related items (what icons/art to use in the Ascendancy Wars screen, etc) and global settings like enabling/disabling creeps and hiding terrain, using a <Mission> tag.
Player Definition
To do much of anything, you'll need to define players next. This is done with individual <Player> tags that enable or disable their AI, sets faction, team, and color, etc.
You'll likely refer to these players later in the script by number, where 0 is the first player defined, 1 is the next, and so on.
Triggers
Triggers are what control anything you want to happen while the scenario is being played, from spawning starting base to calling waves of attacking enemies or giving players objectives. There are several types of triggers which activate off of different events.
Trigger Types
These are the types of triggers you can use in a script, and any specific arguments they support.
Area - Fires when the human player moves a unit into the area.
Build - Fires when a human player builds structures or units.
ActivateTrigger - Activate another trigger (also can be used to activate the trigger it is called from, making a repeating trigger).
AreaIndicator - This places a visible indicator on the map to help the player know where they should go to.
AttackAttackMove - Order an army to move to a specific area, engaging enemies along the way.
AttackUnit - Order an army to attack a specific script-spawned unit
Camera - Move the player's view to a specific area.
CaptureNearestNext - Order an army to capture the nearest neutral or enemy-controlled region
CaptureNearest - Order an army to clear its order queue and capture the nearest neutral or enemy-controlled region (note: ordered unit will stop moving if region is captured before it gets there)
Var - Set or modify a variable. Tip: Set any variable you want to use to 0 in the initial setup trigger to avoid unpredictable results. All values must be integers.
Position Coordinates
The UI for Ashes is defined in XML, it is as moddable as the rest of the game. But we just want to make one small change, we want the game to show us the coordinates. Fortunately there is already a field for that in the UI, it’s just marked hidden. You will find the following toward the end of AshesGameView.xml:
Changing the XML to show locations
To have the coordinates be displayed in game, change this to Hidden=”0”. 0 typically means False and 1 means True so by setting it to 0 we are setting it to “Not Hidden”. You may also want to reduce the FontSize, 20 tends to be fairly large but that is up to you.
This will help you get the exact coordinates when you are playing with your map to figure out where you want to place resources, starting locations for player, where you want events or trigger or where you want to spawn new units.
Trigger Examples
A single trigger can do any combination of the above options. It can popup some text, spawn some units, set an objective give the player some resources and unlock some new building options. It is up to you how you want to combine and use them. Let’s take a look at some examples.
Send an army to attack
An attack trigger
The above trigger is inactive, meaning it needs another trigger to call it before it will activate. Once it does it will spawn 16 units into an army and send them to attack the defined map position. This is a relatively simple trigger, but a common one. With this alone you can create scenarios that spawn waves to attack the player, grant reinforcements to the player or create surprise ambushes.
Reward the player for capturing an area
A region capture trigger
The above trigger occurs when the player captures the region at the specified position. Notice that the trigger starts inactive, so it would need to be enabled by an earlier trigger before it could occur.
This trigger does the following:
Checks the Cap_C_Obj objective in the player’s objective list.
It disables the Cap_B_Ind Area Indicator by setting it’s duration to 0.
It pops up some dialog for the player.
It enables the player’s ability to build Metal Extractors.
It spawns a free Engineer for the player.
It moves the camera to look at the captured region.
It adds a new objective for the player (Mex_Built_Obj).
It gives the player 500 Metal.
It makes the Cap_C_Trigger trigger active.
This is a great example of the kind of combinations that can be done with the trigger system. This is a reward to the player for capturing the region. But it could as easily have triggered an escalation for the enemy forces.